David Ward · Tuesday, 2 April 2019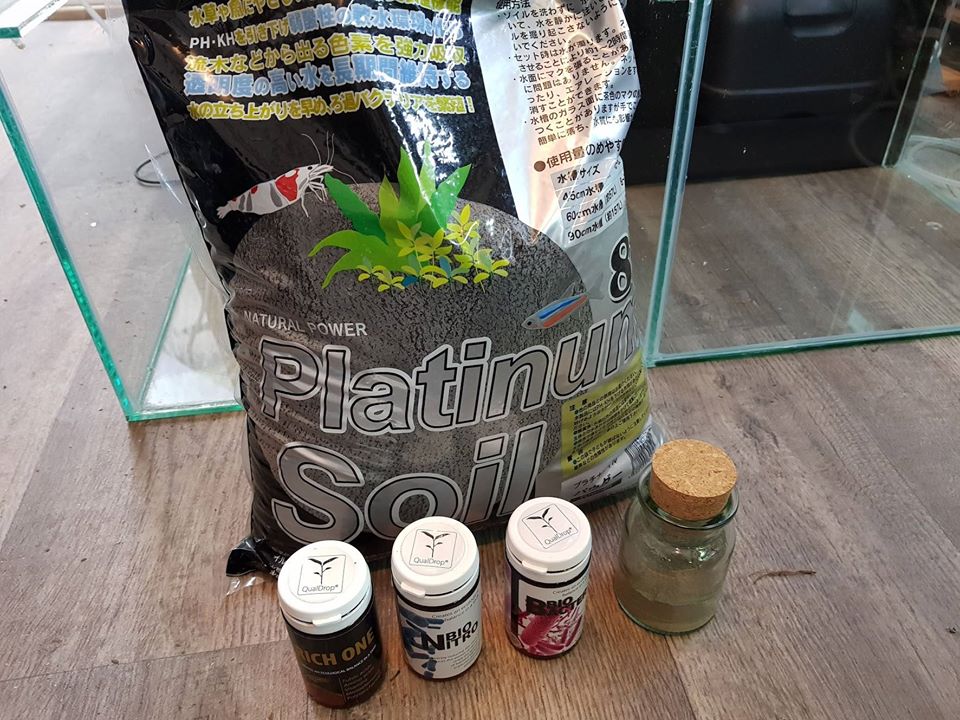 Products - Platinum Soil – is a substrate very rich in mineral components. It contains micro- and macroelements, as well as humic acids (this its deep black color) and fulvic acids. It has a very good porous and stable structure, enabling problem-free desliming and not disintegrating during use Bio Bactor – complex mixture of beneficial non-pathogenic bacterial strains including nitrifying , denitrifying , PSB photosynthetic and active enzymes. It builds a biological balance in the tank. Decomposes organic waste, quickly reduces NH 4 and NO 2 . Protects against tank contamination. It improves the survival rate of aquatic animals. Prevents the growth of harmful algae. Removes accumulated deposits in the substrate. It improves the quality of water in mature tanks. Bio Nitro – BioNitro contains a complex of nitrifying bacteria, denitrification bacteria and probiotics, among others Bacillus natto. BioNitro removes NH4 ammonia nitrogen and NO2 nitrite efficiently and quickly, converting them to NO3 nitrates. Rich One – RICH ONE is an abundance of fulvic acids, amino acids, microelements and oligosaccharides, which are obtained by natural processes, among others, fermentation. Mironekuton - Mironekuton is a rare mineral occurring only in one region of Japan. It is exceptionally rich in minerals and numerous trace elements Setup 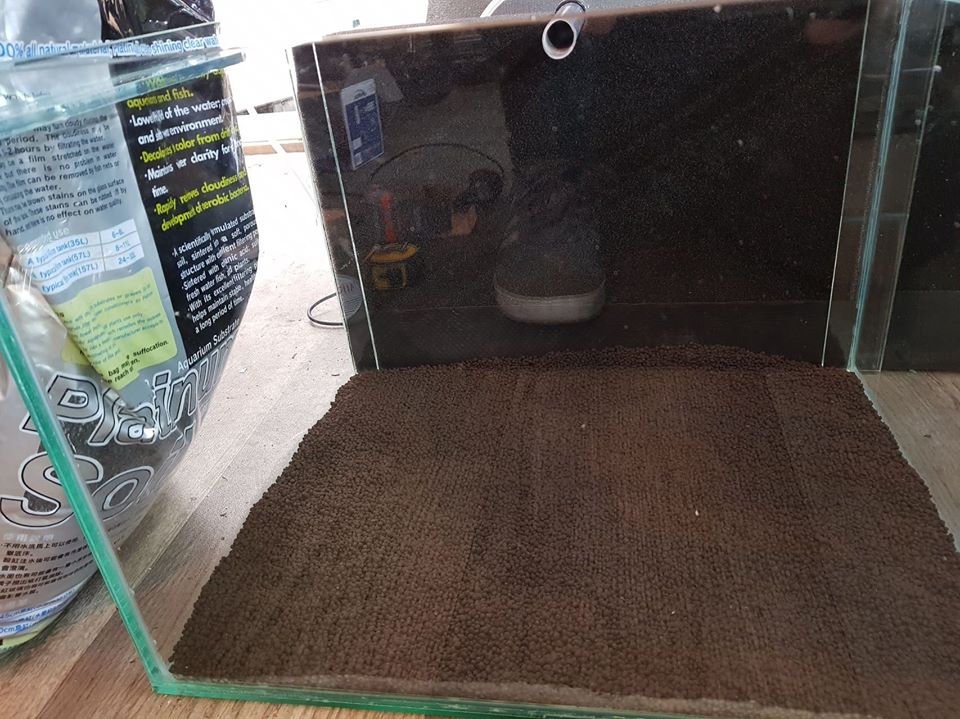 1 cm of Platinum Soil added 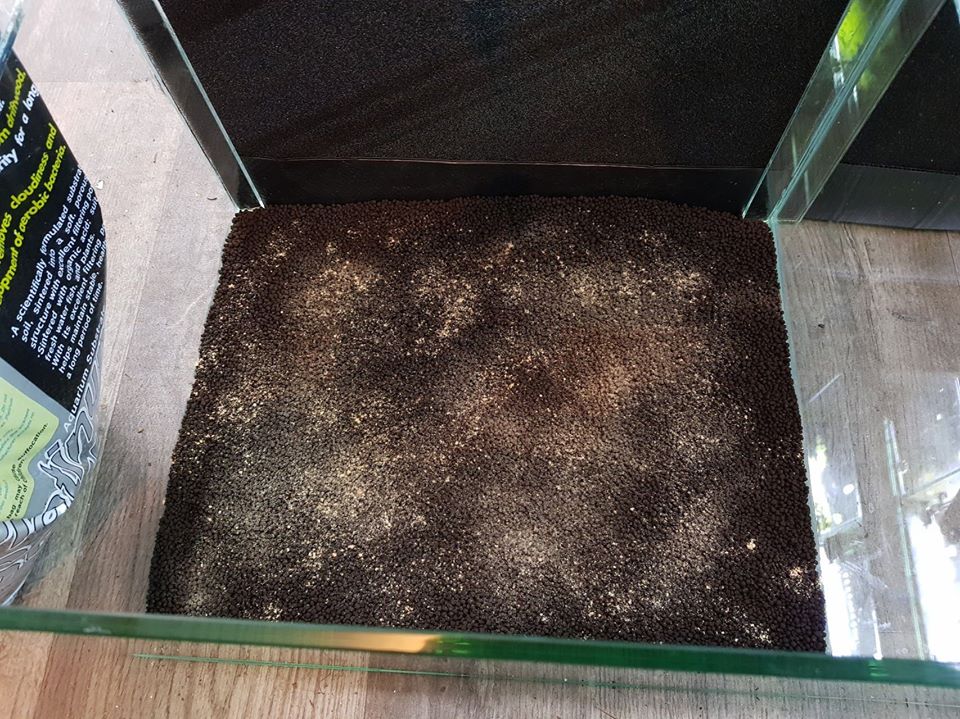 Bacterial and mineral products added Fill your tank with Platinum soil to the level of 1cm, then sprinkle the correct measure of Bio Bactor, Bio Nitro, Rich One and Mironekuton over the soil, then add 1cm more Platinum soil so the total height of the soil is 2cm. 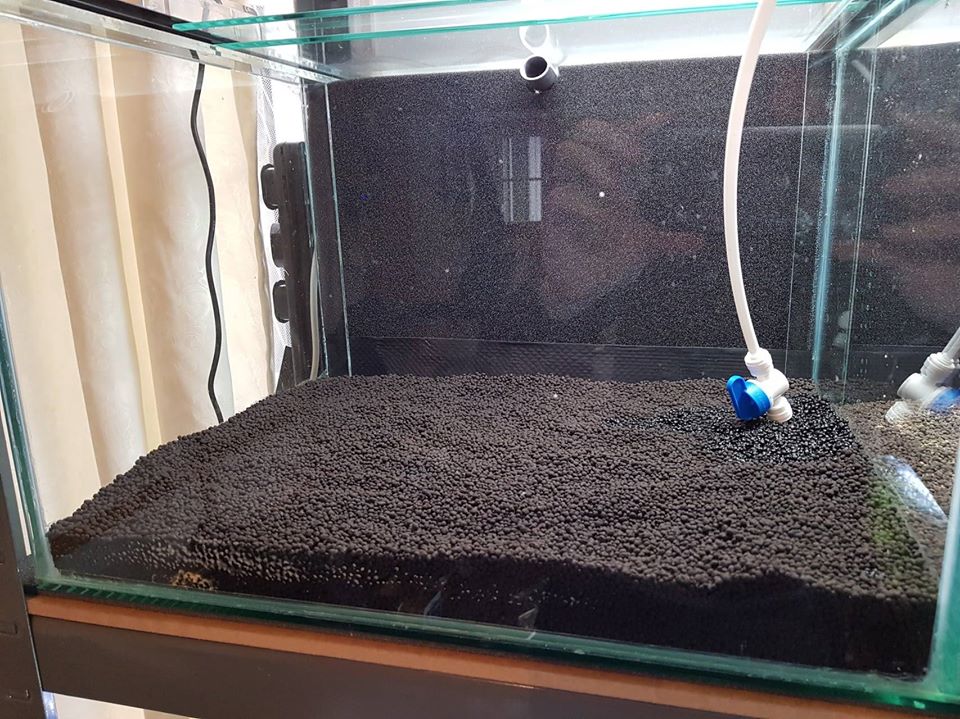 I use 4/6mm pipe to slowly fill the tank with water, you can use a larger pipe and pip the tank if you place the pipe on the empty soil bag or saucer to aviod disturbing the soil. Now start to fill with pure ro water, the reason we use pure ro is to remove the excesses of macro- and micronutrients. Once the tank is full add another dose of Bio Nitro, mixed with about 20ml of tap water or water from a mature tank. Also add a dose of water conditioner, I prefer to use either SL Purify or Seachem Stability. 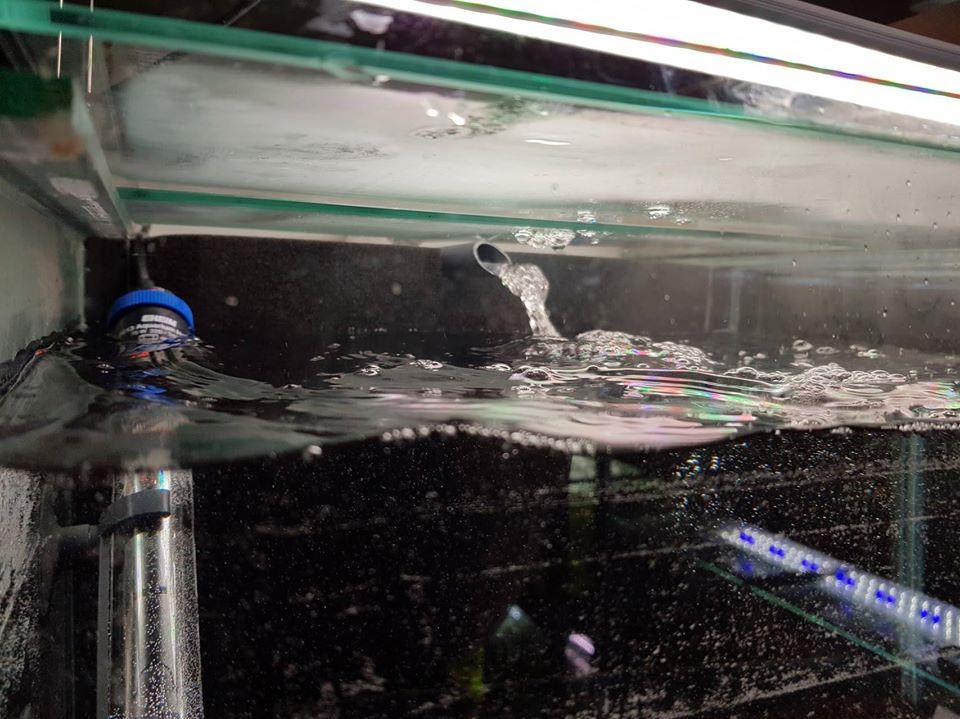 Tank is nearly full so have switched heater and filter on Turn your heater on and set it to 31 degrees centigrade and turn your filter and lights on. Leave the lights on 24/7 for the first 2 weeks then switch them to your normal timed schedule (I recommend 8 hours of lights on a day). 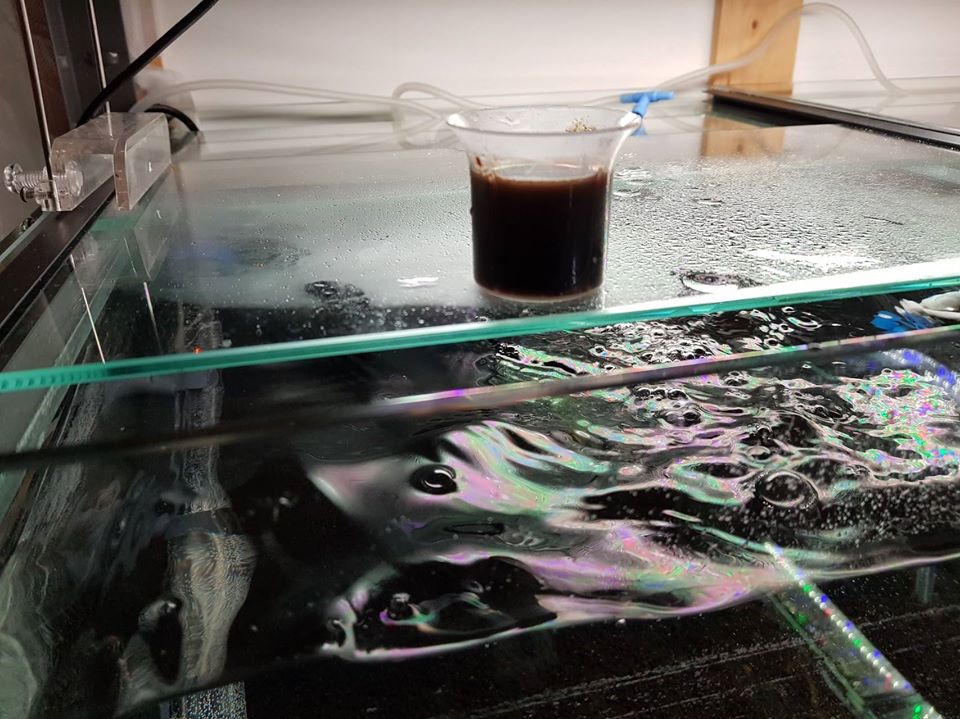 Half dose of bacterial products 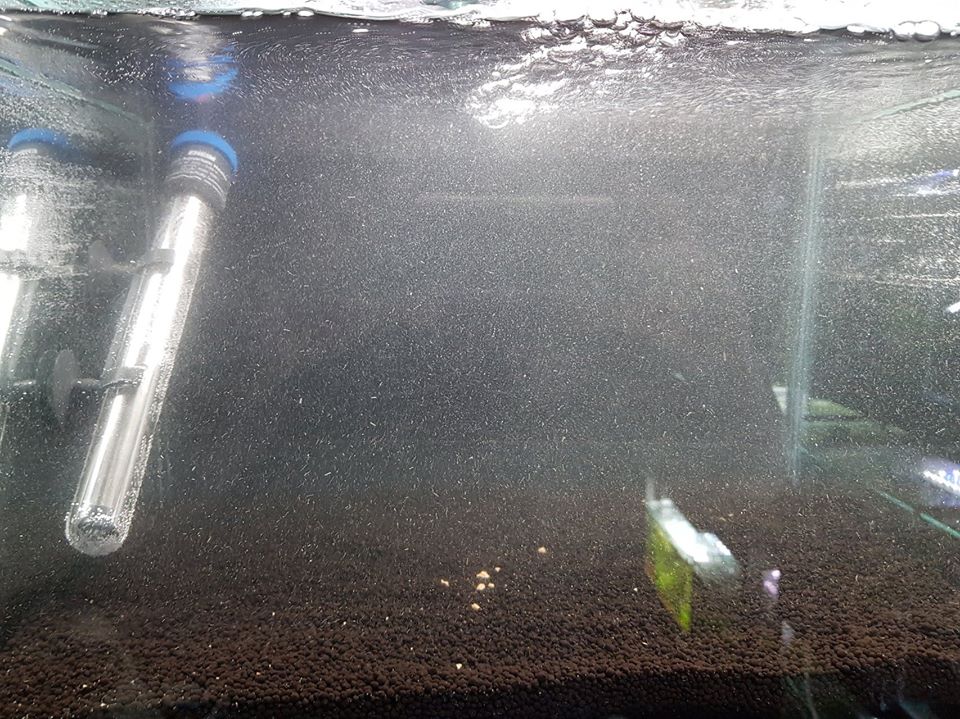 Bacterial bloom, shows the tank is maturing After 1 week do a 50 water change with pure ro water and add a half dose of Bio Bactor and Bio Nitro
Repeat the weekly water change for the next 2 weeks At the end of week 4 test your water parameters, they should be - TDS 80 – 150 KH 0 GH 4 -6 Ammonia 0 Nitrate 0 – 5 It is important that the ammonia is 0, if it is not keep repeating the weekly 50% water changes and adding half measure of bacteria products until the ammonia is 0. Once you have the above parameter, add a dose of Trace Shrimp then start adding shrimp slowly. Only add a couple of shrimp to begin with and monitor them and the tank water parameter every few days.
0 Comments
David Ward · Wednesday, 12 December 2018Taiwan Bee Shrimp don’t like sudden change in their living condition, the most important thing is to keep the parameters stable and if you do change them do it slowly.
Most Taiwan bees prefer these water parameters – TDS 120 - 180 KH 0 – 1 GH 4 – 6 PH 5.8 – 6.5 Nitrate 0 – 15 Nitrite 0 Ammonia 0 Temperature 21 – 23 degrees centigrade Water Changes Depending on how many shrimp you have in your tank water changes should be done every 1-2 weeks and you should change between 10 – 20%. Before you do a water change measure the TDS in the tank your doing the water change in and either match the TDS to within 10+/-. Most important part of the water change is to add the new water slowly. I use a separate tank with a 6/4mm ro pipe with tap so I can adjust the rate of flow into the tank. While I’m doing the water change I add – · SL Aqua Purity – Breaks down organic waste and ammonia, nitrites, nitrates and other harmful substances · Trace One Shrimp - contains over 23 micronutrients and many trace elements · Bio Bactor - beneficial non-pathogenic bacterial · Mironekuton super powder – natural minerals and trace elements · Rich One (every other week) - fulvic acids, amino acids, micronutrients Feeding Don’t feed your shrimp every day, it’s not necessary increases the risk of polluting the water with waste food. I feed my shrimp every other day and vary what I feed them – · Day 1 – Ebi Pro Vital, Bio Probiotic · Day 3 – Ebi Pro Mineral, Bio Probiotic · Day 5 – Skyfish S3, Bio Probiotic · Day 7 – Ebi Pro Protien, Bio Probiotic · Repeat On feed day I also supplement with small amounts of bee Pollen, Moringa powder and baby powder food if I have babies in the tank. Don’t over feed, most food packs state 1 stick per 10 shrimp, I suggest you start off with one stick and see how long it takes the shrimp too finish it off, if it goes very quickly add another stick. If after a couple of hours food is left remove it as it will pollute the water. I use a large turkey baster to remove any left-over food it’s much easier than trying to remove it with yours hands. Testing Test your water regularly, particularly TDS and Nitrate. I test my TDS daily and Nitrate every other day. If your TDS rises more than 10 from the TDS when you did a water change consider doing the water change early, same with nitrate, if your nitrate rises above 15 perform a partial water change following your normal water change procedure. Don’t make drastic changes to the water parameters, and make sure any changes are done slowly as not to upset the shrimp. You can also consider using a de nitrifying bacterial product to lower nitrate, I recommend and use Skyfish N1. Active Soil Review - ADA Amazonia
5/21/2019
0 Comments
David Ward · Monday, 5 November 2018ADA Aqua Soil Amazonia substrates will lower the pH and KH, thus creating an ideal environment for tropical fish, shrimp and aquatic plants. The soil contains organic materials that are much needed to keep healthy shrimp. Humic Acids found in the substrate will promote plant growth.
Now I’ve come across this soil from my aqua scaping days, and it was a highly revered soil. I was surprised to find it also a very very good soil for shrimp tank setup. The soil adjusts the water PH to about 5.8, is a lighter brown than other shrimp soils and is available in either normal or powder versions. This soil LEAKS AMMONIA during setup, this is to allow the tank to fishless cycle, it also means the tank will defiantly cycle and cycle well the down side to this is it will take at least 40 days to 2 months for the tank to stabilise, but once it’s stable the tank conditions are pretty much perfect for Taiwan bee shrimp. One thing I’ve notices about my tanks with ADA Amazonia is the parameters don’t fluctuate, and the water stays crystal clear. The downside to this soil is that it takes so long to cycle plus if your planning a tank reset you’ll need a second tank due to the ammonia that it initially leaks, even with a mature filter it will still take 2-3 weeks before it safe to put shrimp back in. That said it’ still a really good shrimp soil and one used widely by breeders in Taiwan. I would rate this soil 8/10 David Ward · Monday, 5 November 2018Glas Garten Environment Aquarium Soil is an active substrate made of different fired and sterilized earths especially developed for the use in aquaria. It lowers and stabilizes the pH, I find that it lower water in East Sussex to 5.2 – 5.5 if you use recommended amount so I tend to use less. The soil is dark brown and comes in normal or powder versions.
For a tank 112cm wide by 40cm deep and 30cm tall I use 8 litres which stabilises the PH to 5.8. I really like this soil and so do the shrimp, I would go for the powder version which has grain sizes of 1-2mm. I’ve got 6 tanks setup with this soil and all are doing really well and the water is crystal clear, I would say it’s as close to a perfect soil for Taiwan Bee shrimp as you will find, my only quibble is how it drops the PH to below 5.5 but this can be easily remedied by just using less soil. I would rate this soil a 9/10 The less painful way of cycling your shrimp tank and giving them the best living environment possible using Skyfish products.
5/3/2019
1 Comment
David Ward · Monday, 5 November 2018Before we begin, shrimp keeping, and tank setup require patience. The tank cycling process will take at least 30 days. Once you start the cycle, stick to the motto, set and forget it, don't touch it, don't test, don't rush, enjoy.
We are starting a Caridina shrimp tank and the soil we use will buffer the water. All of these steps are the same with a Neocaridina tank just switch out the substrate for sand or something similar. What you'll need.
Day 1 Start of Shrimp Tank Cycle Add at least 1” of active soil to the aquarium. Now we get ready to add Sky Fish cycling products. Sprinkle Skyfish N1 all over the substrate. Don't add too much, but enough to cover most areas. Do the same with Sky Fish M1. Now place the empty bag or a small saucer into the aquarium and slowly begin to fill the tank with remineralised RO water, we recommend remineralising to the TDS you intend to keep your shrimp at, we tend to aim for TDS 120-130, with a GH between 4-6 and KH 0. We recommend starting your cycle with RO to avoid exhausting your soil and it gives you good practice when you start using RO for your shrimp. Once the tank is full, add the heater and set it to 31 degrees centigrade, and switch the light on. For the first month leave the light and heater on 24/7. Turn your filter on. Day 14. We are 14 days in at this point we can add another dose of N1 and M1 to the tank. Some things to remember, don't check parameters right now while cycling. The cycling process can give you numbers that aren't accurate. It's best to sit back and check after 30 days. Day 30. Perform a 25% water change with remineralised water, wait a few hours and test the water parameter. They should be – Ammonia – 0 Nitrate – 5-10 Nitrite – 0 GH 4-6 KH – 0 PH – 5.5 – 6.5 TDS 120-150 If you still have Ammonia or Nitrite readings, add another dose of M1 and N1 and test again in 1 week. Using a Handy Bacterial Liquid
5/3/2019
0 Comments
Robin Abrahams · Saturday, 9 February 2019 Seachem Stability
There are many bacterial liquids you can buy to decompose organics and boost denitrifying bacteria in your tank. Here we discuss Seachem Stability, which is both effective and easily available. The types of bacteria in this product is not the kind of filter bacteria that consume ammonia and nitrites on our filters. Those are slow growing and established over weeks during cycling. Instead the bacteria used here are fast multiplying, meant to occupy the water column as fast as possible. Opaque Sprayer Bottle First we empty the contents of the Stability bottle into a sprayer bottle. In this case we use a 1l opaque bottle to keep light out. The advantage of this is that it is easier to work with than having to use the original bottle's cap to measure out a dose. Just a simple spray delivers a small amount that allows you to dose more accurately and the product to last longer. Below is a list of cases in which you can spray Stability. Spray
Having the sprayer around just makes it easier to dose. It’s just there. It becomes a habit 😊 |
 RSS Feed